How to build a rustic DIY bench?
Design your perfect project in 3D with MakeByMe
Try it in your virtual home using HomeByMe
Use MakeByMe plans to turn your design into reality
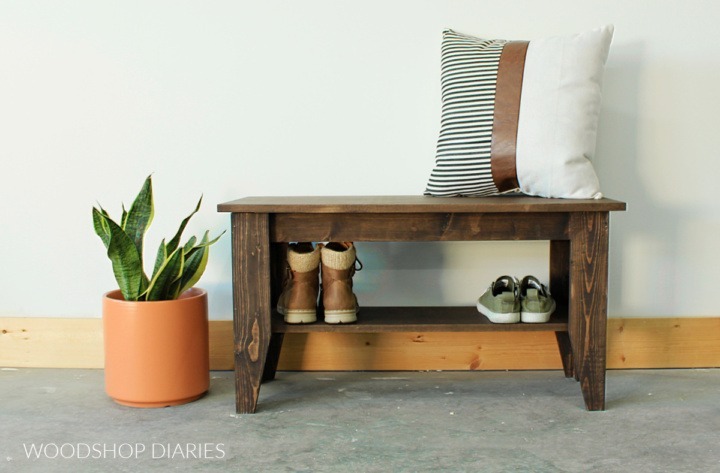
Ideal for an hallway or a dining room, design your rustic bench for a stylish and personalized decor.
Description:
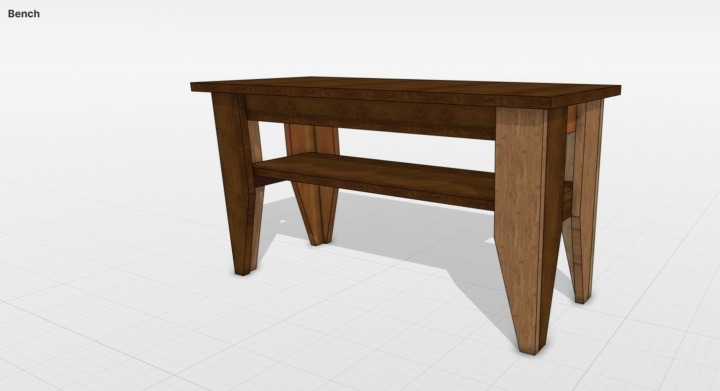
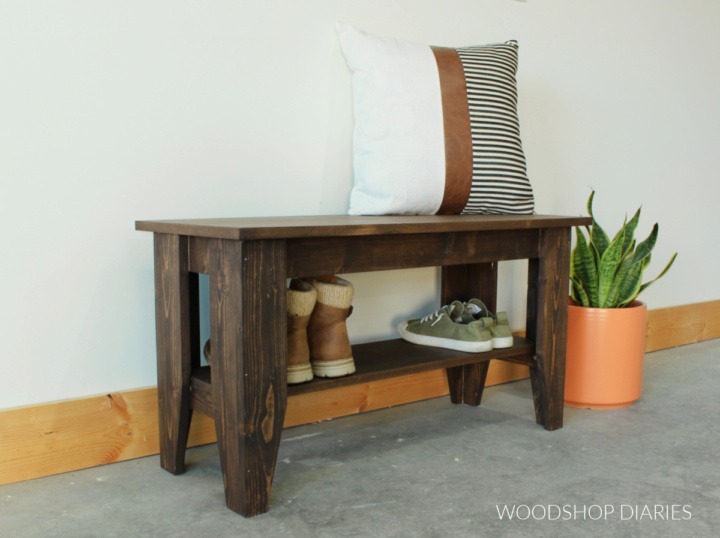
This simple bench features a shelf below the seat, perfect for shoe storage, or for books, etc. It’s a great size for an entryway, a piano bench, or for the end of the bed. It’s also easy to customize if you need it longer or deeper.
For more ideas you can also browse the Community Content to inspire your next DIY project.
Materials List:
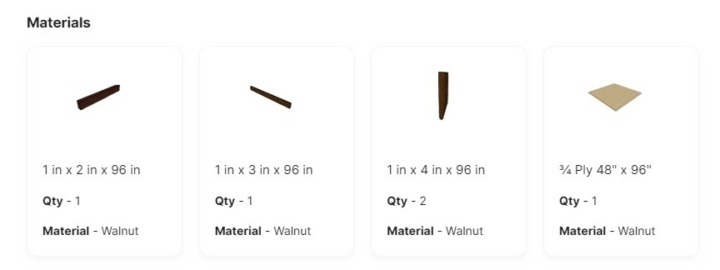
- (1) 1x2x8
- (1) 1x3x8
- (2) 1x4x8
- (1) ¾” plywood 24” x 48” (¼ sheet)
- 1 ¼” wood screws
- 1 ¼” finish nails
- Wood Glue
Tools List:
- Miter Saw
- Circular Saw & Straight Edge Guides (for cutting plywood and tapered legs)
- Drill/Driver
- Finish Nailer
- Clamps
Cut List:
- 1×2 boards
- (2) 11” long
- 1×3 boards
- (2) 11” long
- (2) 30” long
- 1×4 boards
- (8) 18” long
- ¾” plywood
- (1) 15” x 35”
- (1) 9” x 31 ½”

Step 1: Assemble Leg
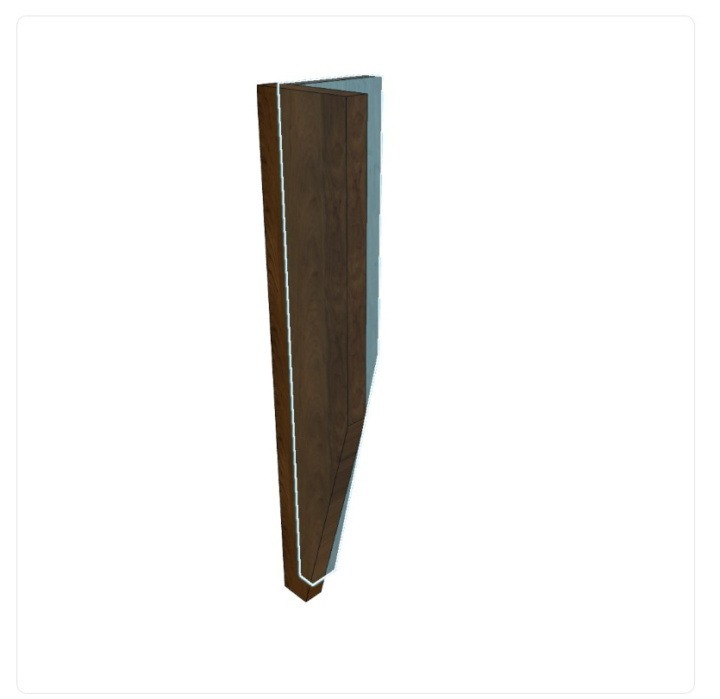
Cut two pieces of 1×4 to 18” long. Measure and mark 11” down from the top of each board (on one edge) and the center point of the bottom edge (1 ¾” from each side). Draw a line between these marks on both boards and use a taper jig on the table saw, a jig saw, or a circular saw to cut along this line.
Then assemble the long, straight sides of the boards together like shown using wood glue and 1 ¼” finish nails (you can substitute screws or dowels if you’d prefer).
Step 2: Assemble Second Leg
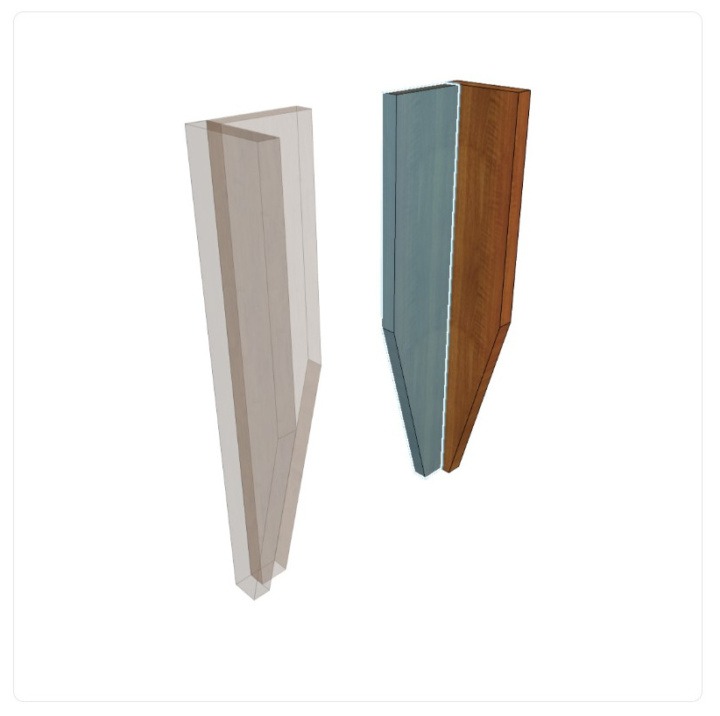
Repeat step 1 to assemble another leg mirroring the first one. Note the orientation of the pieces that make up the legs.
Step 3: Add Top Side Brace
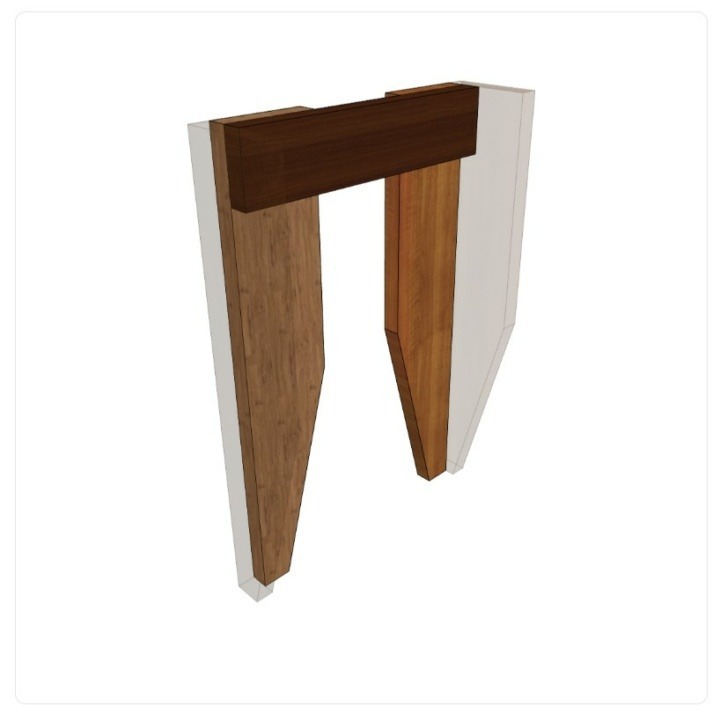
Cut a piece of 1×3 board to 11” long. Use wood glue and 1 ¼” wood screws to secure this board between the legs, on the inside, like shown so that the top edge is flush to the top of the legs.
Step 4: Add Bench Shelf Support
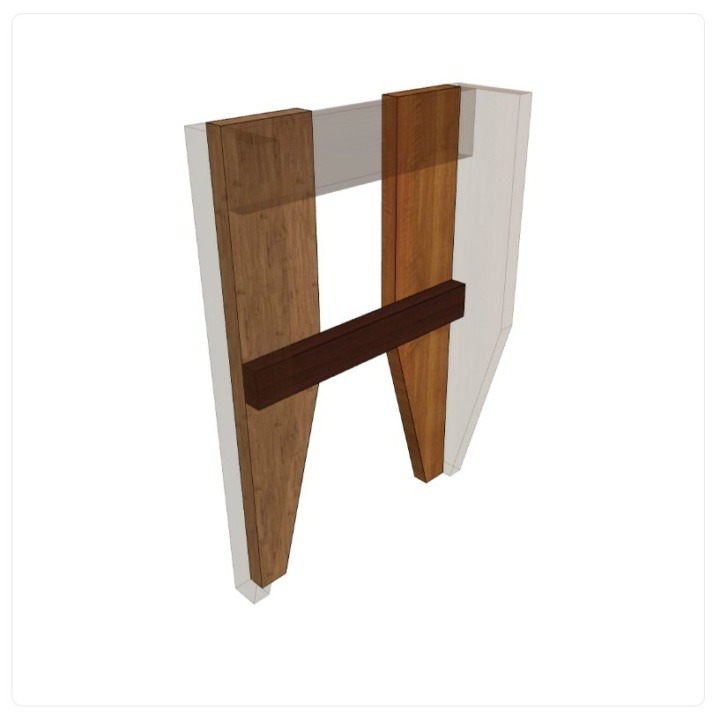
Cut a piece of 1×2 to 11” long. Use wood glue and 1 ¼” wood screws to secure this board between the legs on the inside so that the top edge is 11” from the top of the legs.
Step 5: Build Second Bench Side Frame
Repeat steps 1-4 to build another side frame identical to the first one.
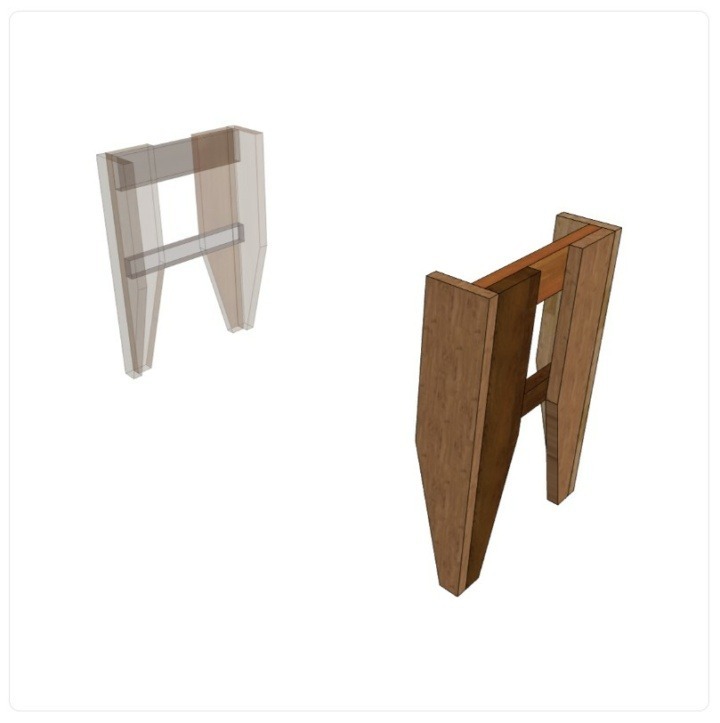
Step 6: Add Seat Support at Front
Cut a piece of 1×3 to 30” long and use wood glue and 1 ¼” wood screws to secure it between the frames on the inside flush to the top like shown in the diagram.
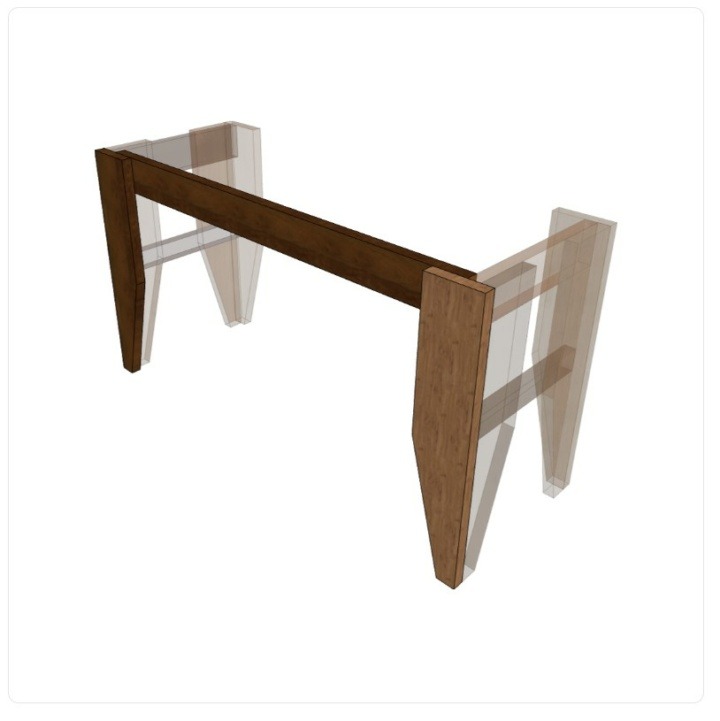
Step 7: Add Seat Support at Back
Repeat step 6 to add another 30” long 1×3 between the frames on the opposite side.
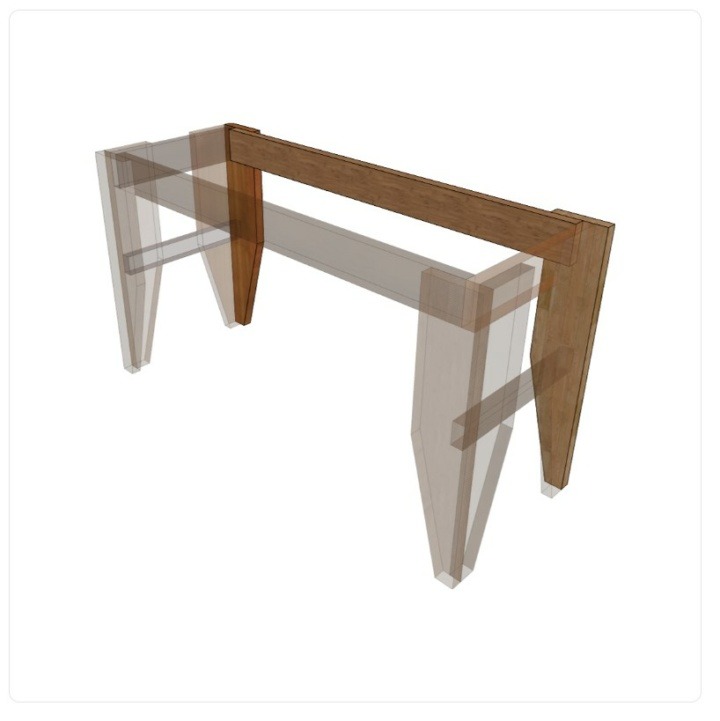
Step 8: Add Bottom Shelf
Cut a piece of ¾” plywood to 9 1/8” x 31 ½”. Use wood glue and finish nails (or 1 ¼” screws) to secure this piece to the top of the 1x2s on the side frames.
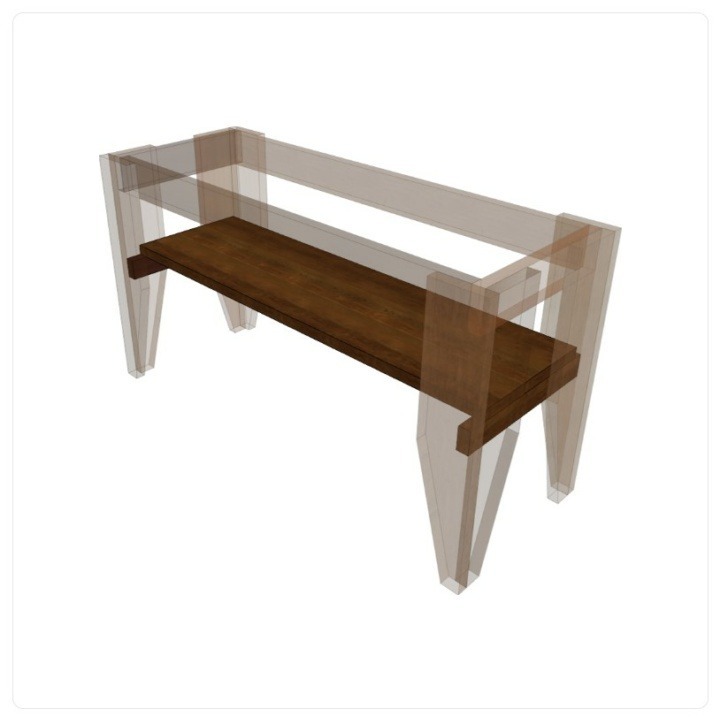
Step 9: Add Top
Cut a piece of ¾” plywood 15” x 35”. Use wood glue and screws from the top side, or Z clips, figure 8 brackets, L brackets, or pocket holes on the framing underneath to secure this panel in place on the top of the bench. Leave 1” overhang on the sides and 1 ¼” overhang on the front/back.
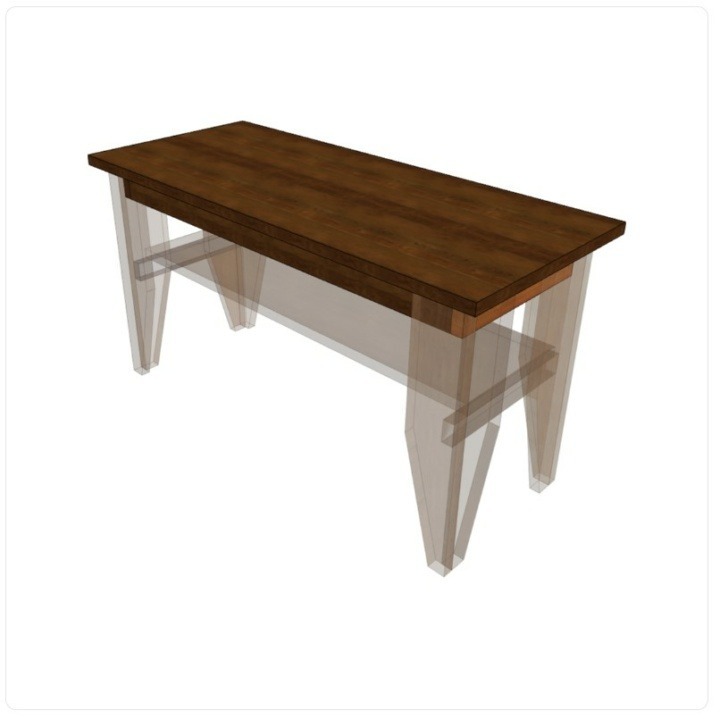
Finished Product
Leave it with a natural finish or apply some stain or paint to complement the decor in your room.
To help you decide why not create a few styles in MakeByMe and visualise them in your home using HomeByMe.
Use MakeByMe to design and build the perfect project for your home.
Design your perfect project in 3D with MakeByMe
Try it in your virtual home using HomeByMe
Use MakeByMe plans to turn your design into reality
Get Started!
