How to build a rolling storage cart?
Design your perfect project in 3D with MakeByMe
Try it in your virtual home using HomeByMe
Use MakeByMe plans to turn your design into reality
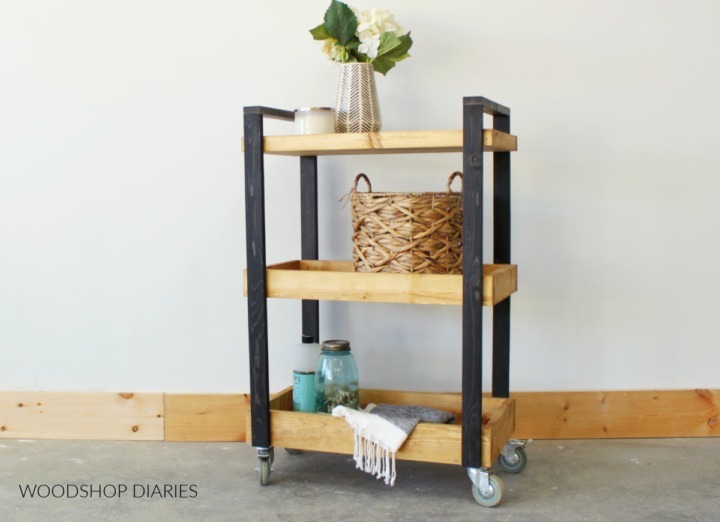
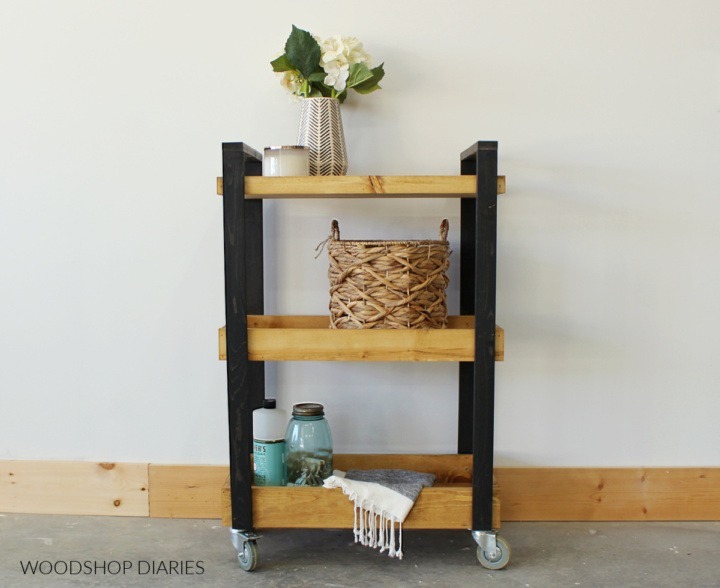
Looking for a small practical storage unit? Why not start making your own rolling storage cart?
Description:
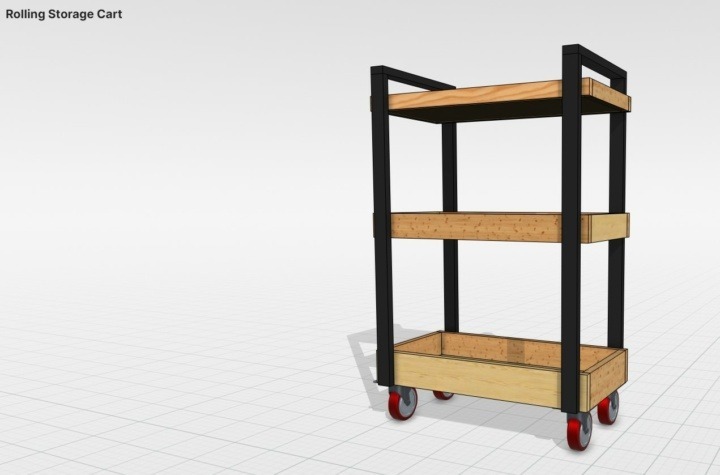
This mobile utility cart is the perfect addition for some extra storage in a laundry room, pantry, craft room or bathroom. The three shelves are great for storing cleaning supplies, pet food, craft supplies, or towels. And the wheels make it easy to move around from room to room or to roll in or out of the way as needed.
For more ideas you can also browse the Community Content to inspire your next DIY project.
Materials List:
- (3) 1x2x8
- (1) 1x3x8
- (1) 1x4x8
- (1) ¾” plywood 24” x 48”
- (4) caster wheels
- 1 ¼” wood screws
- 1 ¼” brad or finish nails
- Wood Glue

Tools List:
- Miter Saw
- Circular Saw & Straight Edge Guides (for cutting plywood)
- Drill/Driver
- Finish or Brad Nailer
- Clamps
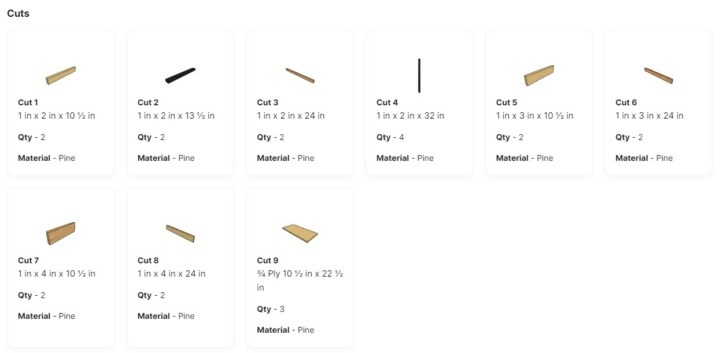
Cut List:
- 1×2 boards
- (2) 10 ½” long
- (2) 24” long
- (4) 32” long
- (2) 13 ½” long
- 1×3 boards
- (2) 10 ½” long
- (2) 24” long
- 1×4 boards
- (2) 10 ½” long
- (2) 24” long
- ¾” plywood
- (3) 10 ½” x 22 ½”
Step 1: Assemble Top Cart Shelf
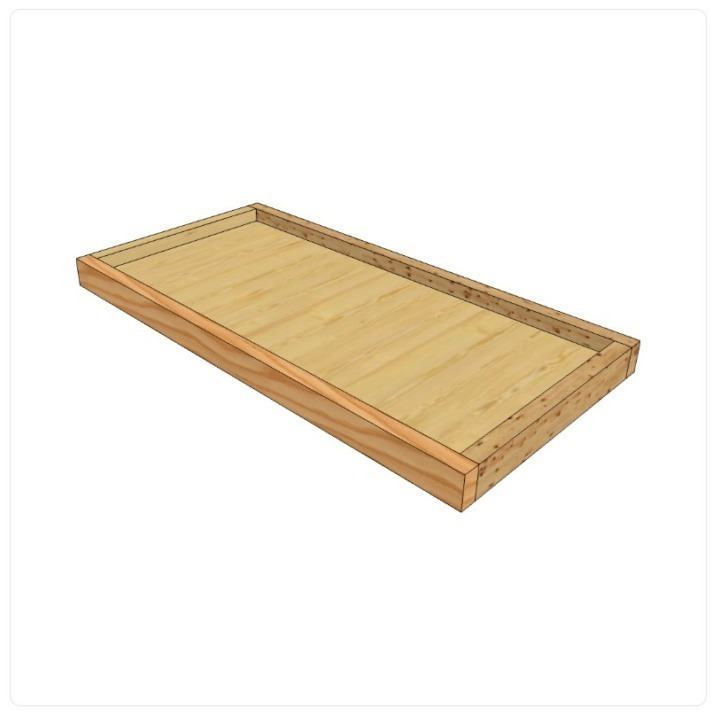
Cut two pieces of 1×2 to 10 ½” long and two pieces to 24” long. Cut a ¾” plywood panel 10 ½” x 22 ½”.
Use wood glue and 1 ¼” brad or finish nails to “wrap” the 1x2s around the plywood to frame the edges. Attach so that the 1x2s are flush to the bottom of the plywood panel so there is a “lip” around the top.
Step 2: Assemble Bottom Cart Shelf
Repeat step 1 to assemble an identical tray/shelf except this time, use 1x4s to frame the plywood panel vs 1x2s. The lengths of the pieces should remain the same.
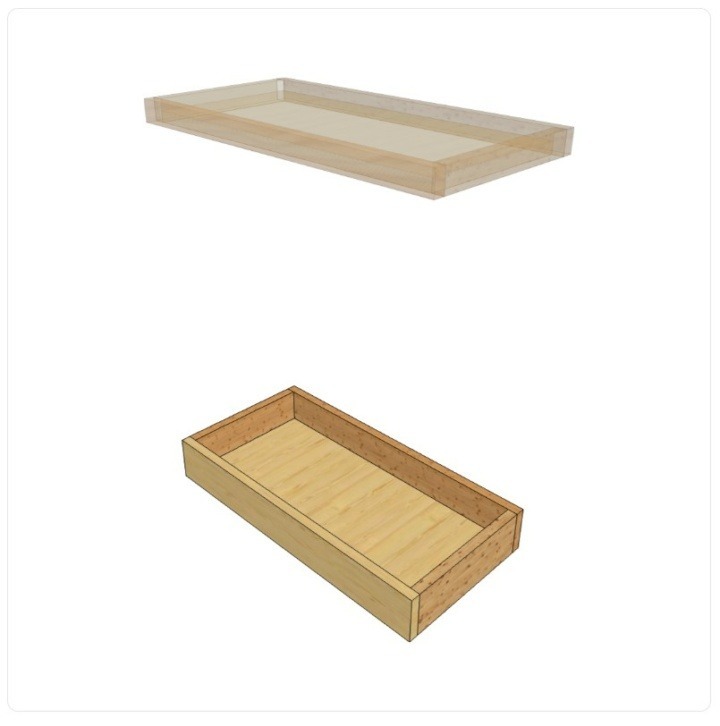
Step 3: Assemble Middle Cart Shelf
Repeat step 1 to assemble an identical tray/shelf except this time, use 1x3s to frame the plywood panel vs 1x2s. The lengths of the pieces should remain the same.
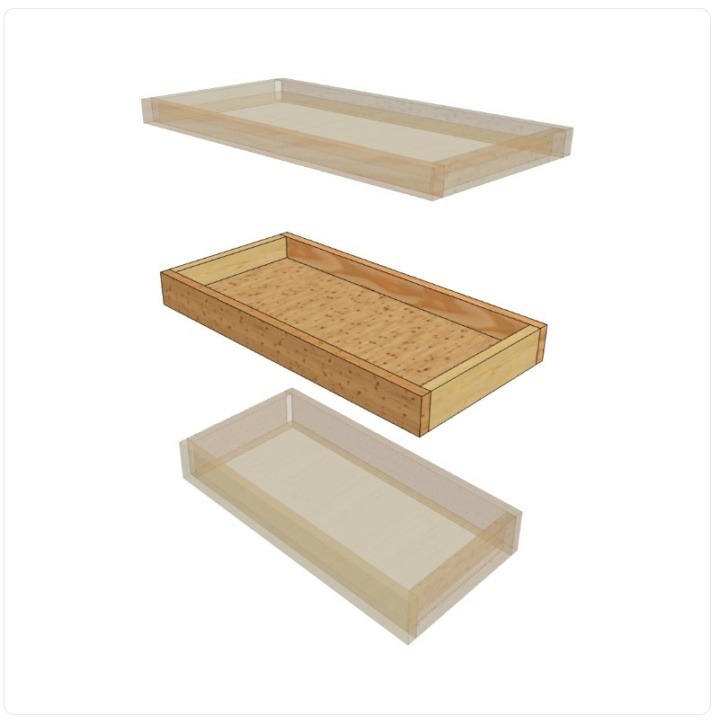
Step 4: Install Cart Frame Leg 1
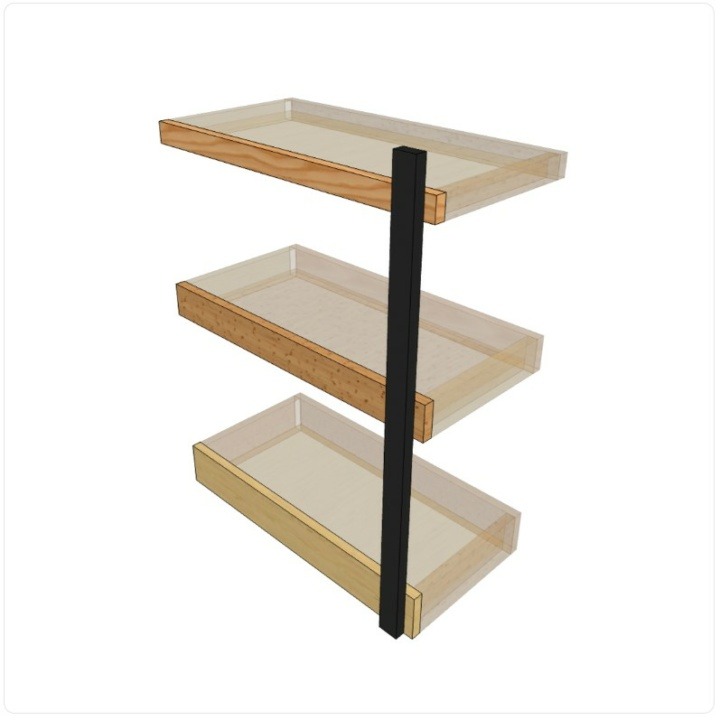
Cut a piece of 1×2 to 32” long. Attach the trays/shelves to this piece using wood glue and 1 ¼” screws from the inside of each shelf. The 1×2 should be about 1” from the outside corner of each shelf/tray.
Attach so that the bottom of the 1×4 framed shelf is flush to the bottom edge of the 1×2. The top of the 1×2 framed shelf should be 2” down from the top edge of the 1×2. You can install the 1×3 framed middle shelf anywhere between them where desired.
Step 5: Install Cart Frame Leg 2
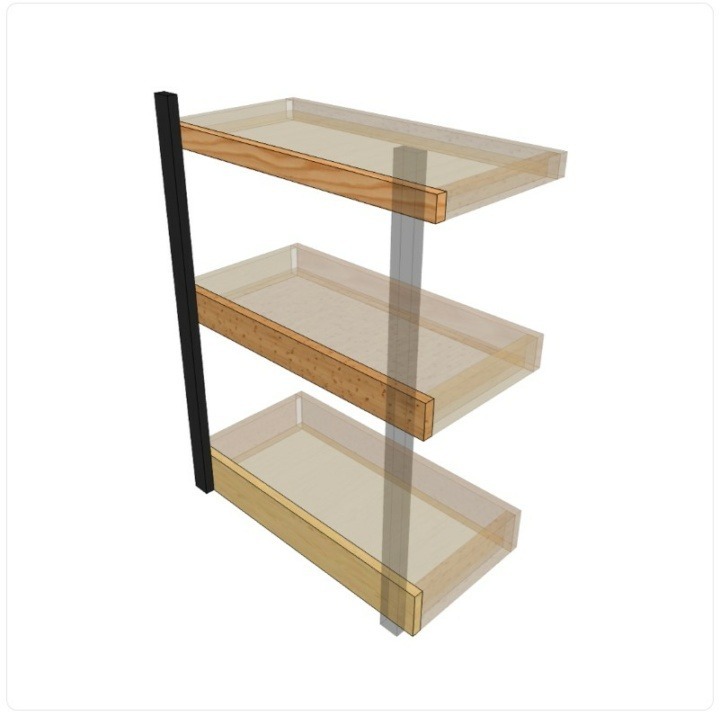
Repeat step 4 to install a second 32” long 1×2 leg on the same side, but other end of the shelves like shown in the diagram. Use wood glue and 1 ¼” wood screws to secure.
Step 6: Install Cart Frame Legs 3 & 4
Repeat steps 4 and 5 to add two more 1x2s on the opposite side of the cart using wood glue and 1 ¼” wood screws.
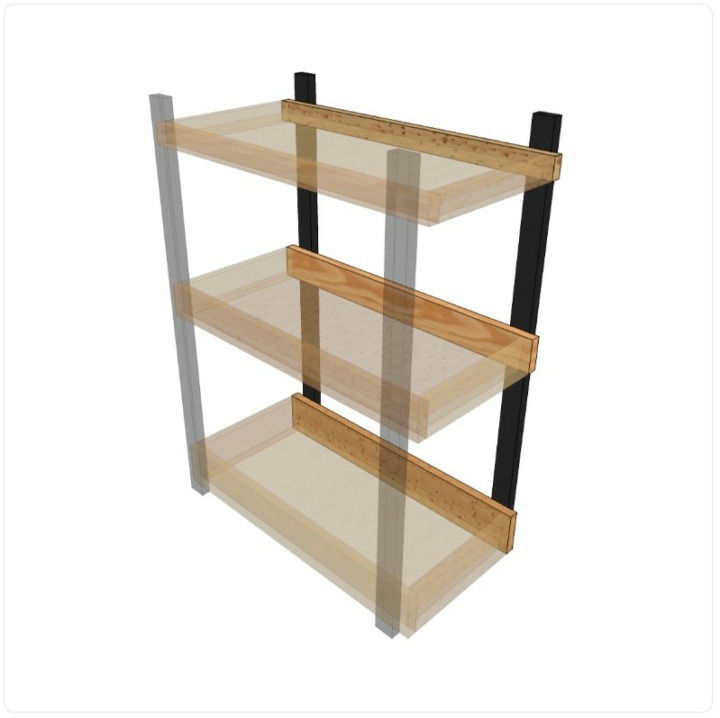
Step 7: Add Cart Handle 1
Cut a piece of 1×2 to 13 ½” long and use wood glue and brad or finish nails to secure it across the top of two opposite legs to make a cart handle.
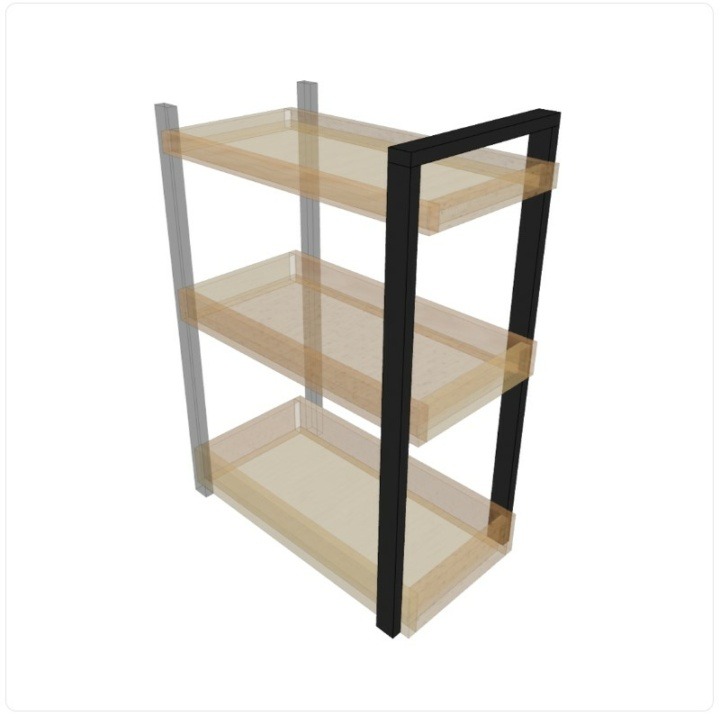
Step 8: Add Cart Handle 2
Repeat step 7 to add a second 1×2 piece across the two other cart legs.
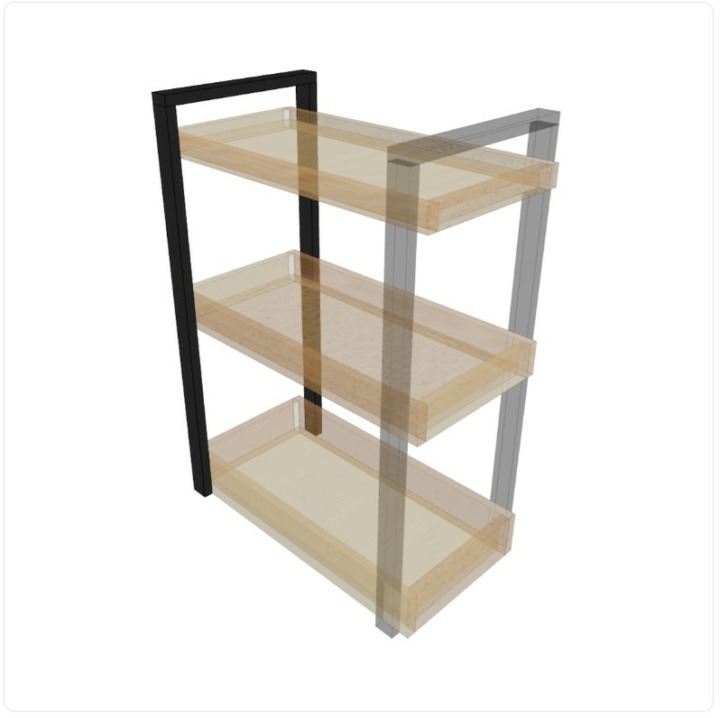
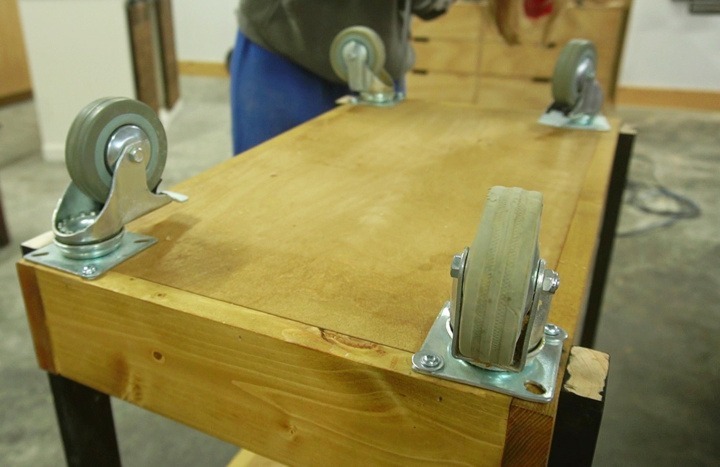
Step 9: Add Wheels
If desired, attach caster wheels to the bottom of the bottom shelf/tray. Use 1 ¼” screws, driving into the 1×4 framing and not into the plywood panel. If you do drive screws into the plywood panel to attach the caster wheels, use 5/8” wood screws instead.
Finished Product
Leave it with a natural finish or apply some stain or paint to complement the decor in your room.
To help you decide why not create a few styles in MakeByMe and visualise them in your home using HomeByMe.
Use MakeByMe to design and build the perfect project for your home.
Design your perfect project in 3D with MakeByMe
Try it in your virtual home using HomeByMe
Use MakeByMe plans to turn your design into reality
Get Started!
